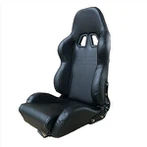
Installing racing seats in your car involves several steps to ensure they fit and are safe.
Here's a guide to help you:
Tools and materials needed:
- Universal racing seats
- Seat brackets and sliders (if not included)
- Socket set or wrench
- Drill and drill bits (if modifications are needed)
- Bolts and nuts (usually included with the seats or brackets)
- Safety glasses Prepare the seats.

Attach sliders.
If your racing seats come with sliders, put the seat on its side on a soft surface. Align the holes on the sliders with the holes on the bottom of the seat. Insert and tighten bolts. If you don't have sliders, skip this step.
Attach seat brackets to sliders.
Align the holes on the sliders with those on the brackets. Put bolts through and secure with nuts. Tighten everything properly.
Install side mounts (if applicable).
Attach side mounts: Align the holes, insert bolts, and tighten them down.
Position the seat and insert it into the side mounts.
Put the seat between the side brackets, lining up the holes on each side. Secure with bolts.
Secure to vehicle floor.
Align with factory holes. Find the holes in your vehicle's floor where the factory seats were attached.
Line up the new bracket holes with these.
Bolt down the seat.
Secure the new seat bracket to the floor with the original bolts.
If using sliders, slide the seat back for the front bolts and forward for the rear. Don't overtighten.
Check Positioning
Adjust for comfort. Before finalizing, sit in your new seat and check for comfort and accessibility to controls.
If adjustments are needed, you can reposition by using different holes on the brackets or sliders.